

Notion starter kit: Make it easy to find information
The less we have to think about where something is, the more we can think about what to do with it.

In my last list of lessons, I outlined the obscene number of ways I’ve learned to access Notion through less clicks. In this post, I’m going to regale you with my ingenious strategies for quickly surfacing information once we’re in.
As the number of pages in our workspace increases, so does the time and effort it takes to find what we’re looking for. So by putting thought into how we input and retrieve information we can expedite the time it takes to get what we want.
Here’s an overview of my learned lessons in this post:
Routing information
Route information intuitively: Define building blocks
Route information automatically: Define where everything should go
Route attention: Create cover pages
Route through time: Schedule pages to resurface
Formatting information
Database views: Create a frontend for raw data
Titles: Choose words wisely
Gallery: Put important pages in a gallery
Toggles: Take advantage of toggles
Searching information
Search globally
Search databases
Search pages
Route information intuitively
When information architecture is intuitive, we don’t need to remember where things are. We simply ask ourselves where it makes sense for it to be and we’ll find it every time.
Route information intuitively: Define building blocks
Since I started organizing my Notion within a life block system, I’ve not only found it easier to find things, but I’ve noticed that the way I think about my life feels more balanced and intentional.
My life blocks are based off of The Wheel of Life, a proposed taxonomy for categorizing the major building blocks of our life. I dwindled down the official version into categories that resonate more with how I view my life: body, environment, mind, operations, and social.
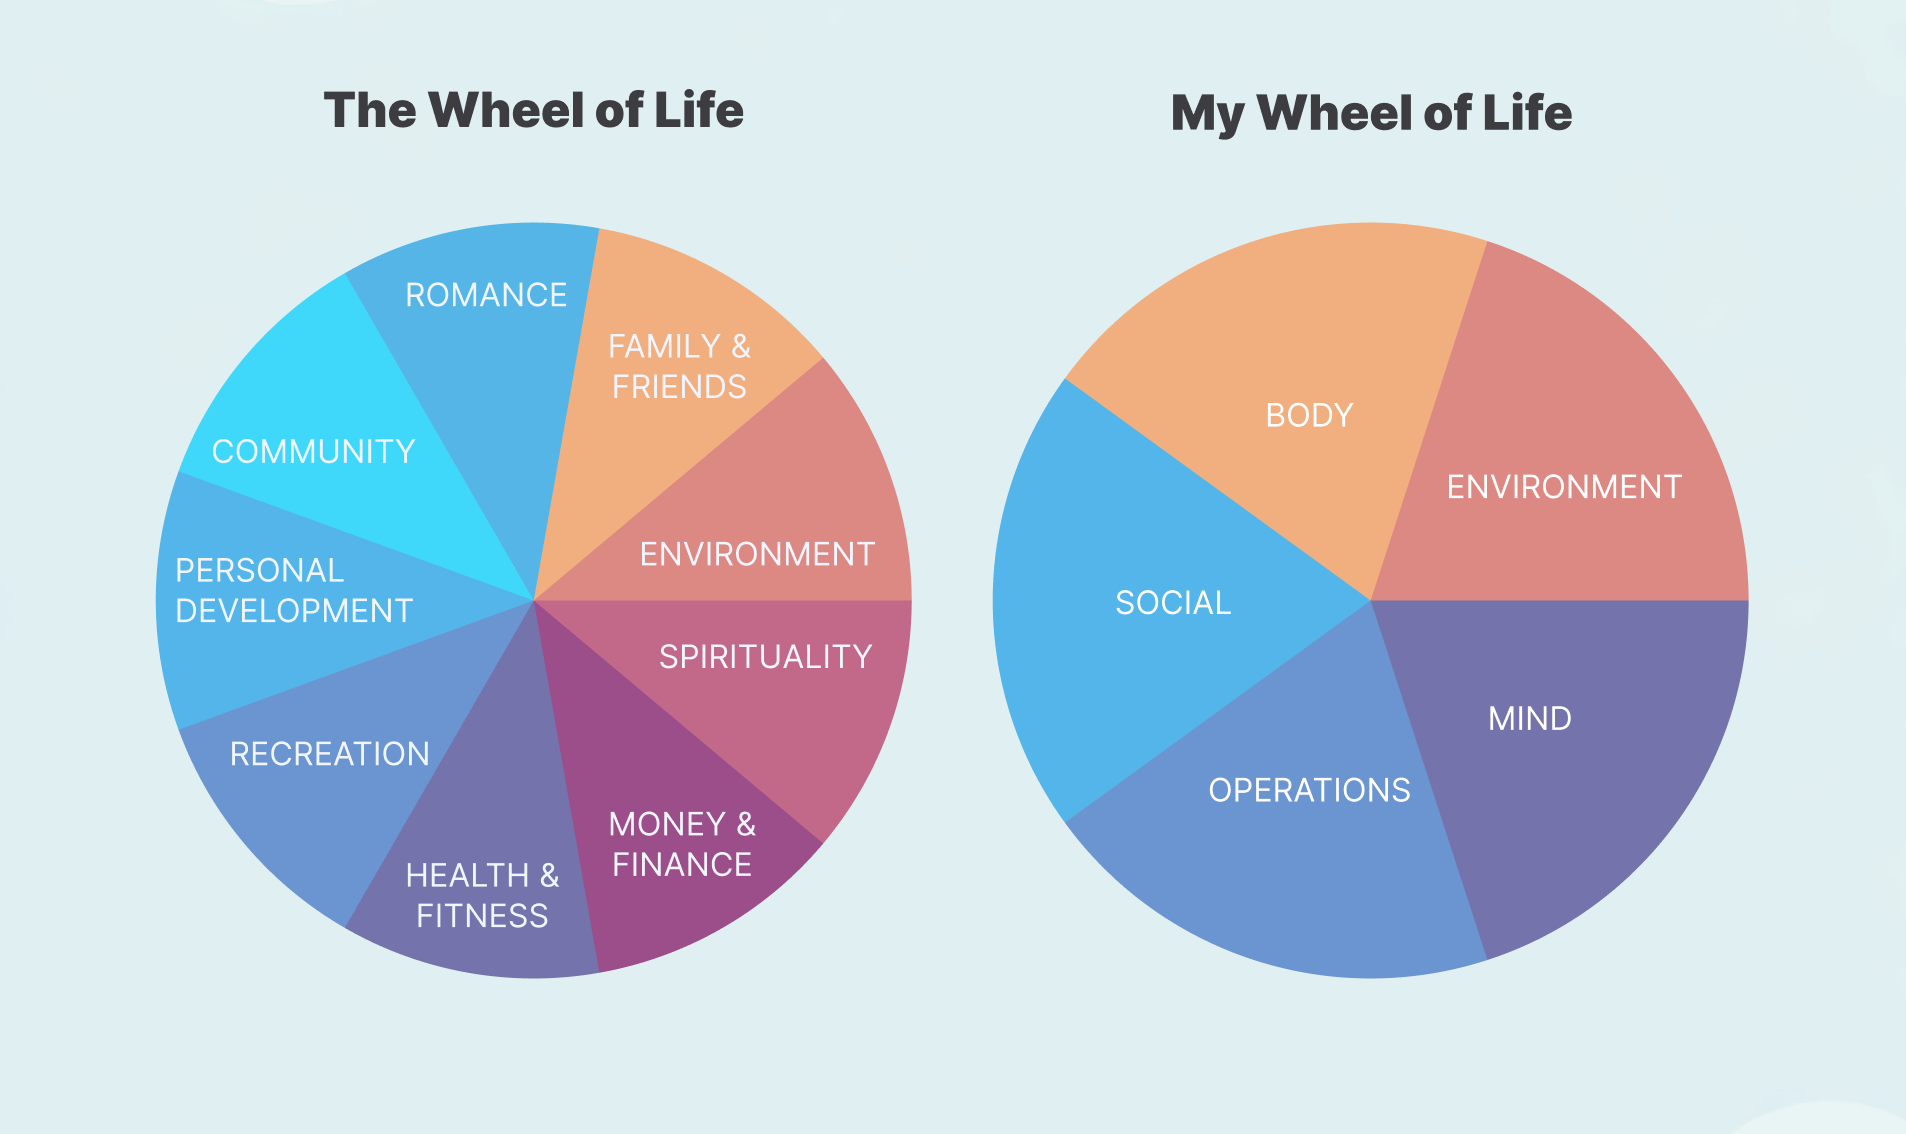
The idea is that by creating these 5 root pages in Notion, every system and every page I have will naturally fall into one of those blocks and, as a result, they’ll be intuitive to find.
In practice: Setting up a root page

1. Add a new root page: Create a top level page by clicking the `+ Add new` under the “Private” label in the side panel. I titled mine “Life Blocks”.

2. Create a gallery db: In that page, I created a new database by typing `/gallery` and I also titled that database "Life Blocks".

3. Add building blocks: I added 5 pages to my gallery and titled them with my blocks: "Body", "Environment", "Mind", "Operations", and "Social".

4. Enable sub-items: In the settings of that gallery, I enabled Sub-items with the “Display options” set to “Card property”. This will enable any subpages to display in the card, creating what I use as my global table of contents view for my entire Notion workspace.

5. Use as table of contents: I copy the link to that gallery and create a linked view by pasting it to the top of any page I visit most often. This way I can access all of my major pages and subpages in just a couple of clicks.
Route information automatically: Define where everything should go
In my last chapter about making Notion easy to access, I mentioned my latest pet project Spark Notes: my intention to create a quick capture tool that routes notes to their proper destination.
I’m happy to report that it was a success! I essentially created a set of instructions that tells a Notion AI agent “when you receive x type of note, send it to page y”.
Now, whenever I want to quickly record a note, I double-tap the back of my phone to trigger an input field. I submit my note and an AI agent takes it and sends it to the place in my Notion where it belongs.
I’ll dive deeper into the mechanics of that pipeline in another post, but my main learnings from that project were two-fold:
The first lesson I learned is that I take notes faster when I don’t have to think about where to put them. Because I now have someone else who knows where my information belongs, I no longer have to think about that myself. I just have to enter it in and my Notion agent takes care of the rest for me.
The second lesson I learned is that I take more notes when I don’t have to place them directly. My process before was: open phone, open Notion app, find page I want through multiple navigation clicks, and enter my note. A few too many steps for my taste. But now I have reduced that to: open my phone, tap the back, send a note. The fact that this process is so friction-free has made me take even more notes.
Route your attention: Create cover pages
A lesson I like to keep in mind when designing new pages is the importance of reducing “time to impact”. It’s a product principle a colleague of mine introduced me to about how we can increase the chance a person will stick with an app if we enable them to experience its benefit sooner rather than later.
When it comes to architecting a Notion page, reducing time to impact means surfacing the most important information to what I call the cover page — what we see when we first land on a page before scrolling.
In practice: Value-driven cover pages

I can convince myself that anything is worth working on if I'm able to tie it to some deeper value I feel strongly about. So oftentimes, in my workspace, I'll use my cover page to highlight the reason a page is important to me.

For example, at the very top of my Body block page I remind myself how ergonomics and aesthetics are the body values I care most about. And at the top of my Social block I remind myself how relationships that are uplifting and built on alignment are the ones that I want to prioritize in my life.

Figuring out what information belongs at the very top of a page has been a meaningful way to remind myself what information is most worth finding.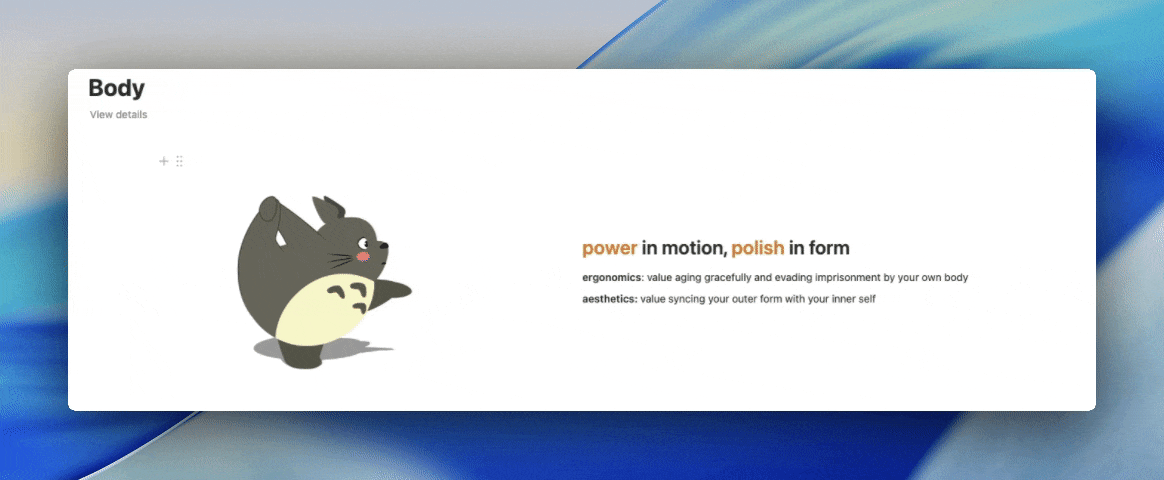
Route through time: Schedule pages to resurface
Sometimes the best way to find information is to let it find us.
I love recording information about my life, but I hate the idea of that information being siloed in some server somewhere, never to be seen again.
Some of my favourite systems have been ones where I’ve scheduled pages to resurface themselves after some time.
In practice

For example, my daily journal surfaces my entries from one, two, three years ago to the day, and so on. So if today is Feb 22, 2026, then my journal will also show me my entries on Feb 22, 2025, Feb 22, 2024, etc.

Because of that, I get a daily glimpse of how much growth I've experienced over the years and a fun conversation topic anytime I remind my partner what we were doing on that day the years before.


To set up a "Years to the day" view

1. Go to a database in your workspace that already has a date property (ex. any calendar you already use)

2. Create a new Formula property and title it something like "Years to the day".

3. Copy and paste the following formula into the formula property:(formatDate(prop("Date"), "D/M") == formatDate(now(), "D/M")) and (formatDate(prop("Date"), "L") != formatDate(now(), "L"))

4. Create a new List view and add a filter to show pages where the Years to the day property is checked.
Format information thoughtfully
I’ve already got a whole chapter prepared on how to format our pages so that they’re easier to read, but in this chapter, I’ll highlight some of my favourite ways to format information specifically for the sake of finding it more easily.
Database views: Create a frontend for raw data
A view in Notion is a way of converting raw data into different insights. I find it helpful to think about them as mini products — practical tools, each with their own duty. And as with the creation of any good product, it helps to consider each one’s value proposition.
My approach: Some product questions I like to ask myself when creating or auditing my database views:
What raw data should I highlight?
What insight does it afford me?
What action does it motivate me to do?
Example: Say I’m creating a movie database to track every film I watch.
Raw data: All of the information about each movie that I might consider collecting:
Movie name, Genre, Main actors, Production studio, Platform used, Release date, Director, Synopsis, Movie poster, Date watched
Views: The mini products I might want to create from that raw data:
View 1
Data to highlight: Movie name, movie poster, date watched, personal rating
Type of view: Gallery
Insight afforded: Overview of movies watched and enjoyed
Action to motivate: Look back on year
View 2
Data to highlight: Platform used, date watched, personal rating
Type of view: Bar or pie chart
Insight afforded: Most and least used platforms
Action to motivate: Cut back on least used platforms
View 3
Data to highlight: Genre, date watched, personal rating
Type of view: Bar or pie chart
Insight afforded: Most enjoyed genres
Action to motivate: Seek out more movies from fav genres
Titles: Choose your words wisely
I’ve learned that a good title can help me remember a lot about a page without even looking at it.
I was inspired by the show Friends and how they start all of their episode titles with “The one...” (ex. “The one where Joey speaks French”, “The One with All the Rugby”).
For my daily journal, I started doing the same thing a few years ago, and I titled all of mine “The Day I...”, followed by a short list of the major unique events of that day (ex. “The day I went to the miniature museum”, “The day I tried cross country skiing”).
Now, when I re-encounter a day title, memories from that day are triggered without even looking at the details of the page.
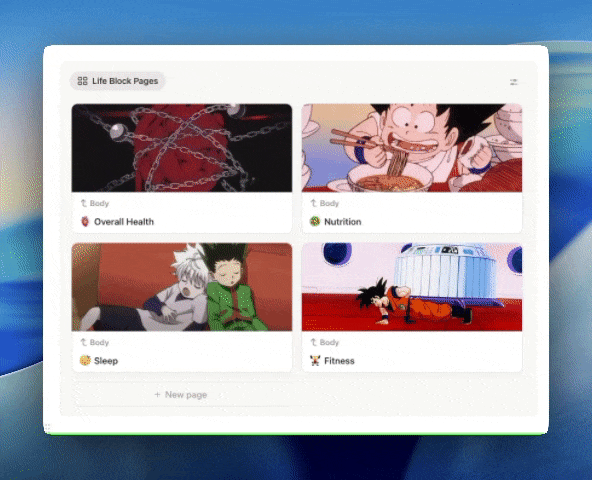
Gallery navigation: Put most important pages in a gallery
As the saying goes, an image is worth a thousand words. Which explains why I’ve found that I can navigate through pages a lot faster when I have images to anchor the page.
On each of my life block pages I place a gallery of its subpages right at the top so that I can get to where I want to go even faster.
Toggles: Take advantage of toggles
I find that it helps me navigate through pages much more quickly when I’ve divided my page into toggleable sections. Especially when I’ve combined those toggles with headers, which we can do by creating a toggle with a heading.
Search information easily
Sometimes the best way to find information is not by going to it, but by having it come to us.
Search globally: Using the global search from the side panel is how I find info most frequently. And it’s even more functional now that Notion added a page preview feature. Here are some quick learnings that have come in handy for me:
Accessing global search: On desktop, we can access it through the side panel using the search button, or we can use the very handy keyboard shortcut:
CommandKOpening pages in new tabs: Holding
Commandwhile clicking a page will open it in a new tab. Similarly, when a page is highlighted (say you were navigating through pages using your arrow keys), clickingCommandEnterwill open it in a new tab.Copying links: Another handy keyboard shortcut is
CommandL. When a page is highlighted in the search results, using that keyboard shortcut will copy the link to your clipboard.Narrowing down: It can sometimes help to use the filters under the search bar. Especially, if you took advantage of something like the life block system. Because in that case, even if you forgot the exact location of a page, you’ll no doubt remember which block it belongs to.
Quotes: Use quotes to search for exact strings, as opposed to key words.
Search databases: Sometimes we might be looking for a specific page in a database. In those situations, it can be helpful and faster to use the database-specific search. Here’s my main learning that I almost always use:
Keep a raw version handy: When using the search from the database toolbar, I find it helpful to have a raw database view on hand. A raw database view is a simple table view with no filters or groupings, and all of the database properties set to visible. If I ever need to find something in a database, I’ve found that to be the only view that guarantees I’m supplying the richest dataset to my filter.

Search pages: Finally, when we are inside of a page and we’re looking for specific information, here are a couple of basic features I appreciate Notion for having put some extra thought into:
Command F: I have a special appreciation for the thought that Notion’s UX designers put into their custom page search (
commandF) feature. Not only does it perform its basic duty of finding text matches in a page, but it also allows users to replace text.Table of contents: We have access to two types of table of contents on a page: floating and inline. From what I can tell the floating one on the right side of a page is only available on desktop, so if we want to give ourselves an upper hand on our phone, then I’ve found it helpful to enable an inline one on particularly long pages. To do that we simply have to type
/tocat the top of our page and ensure that we’ve made use of proper#,##,###headings throughout our page.
We’ve reached the end of my learnings lineup for today, but stay tuned for next time when I revisit my favourite ways to reverse mistakes.
See you soon! 👋😁